Most of the PC users wants to experience new and trendy operating systems, even they are using latest windows 7, 8 OS and some people wants to use both operating systems on their computer without formatting their already Installed OS. For those PC users, In this tutorial I will explain you step by step to dual-boot your PC to run two or more operating systems. Before going to that you have to get clarity about dual-boot, It means you can use two or more operating systems on single physical memory.

Step By Step Guide To Dual-Boot Ubuntu And Windows
To Dual-boot ubuntu/Linux and windows 7 your PC/laptop should meet some basic benchmarks. I listed those requirements below:
- Your PC is running with windows 7, 8, or higher version.
- CD/DVD burner and empty CD/DVD or USB with minimum 1GB capacity.
- Most Importantly backup your windows Installation. ( I will explain It clearly in step 3 )
- Internet Connection and administrative access to PC.
- Hard disk must contain 30 GB of free space.
Step 1: Select Your Linux Distro
Linux have so many distro's (Linux distributions) configured for both beginners and advanced users. In these you have to choose suitable distro for you. If you are a beginner go with Ubuntu, It is completely enhanced for beginners and easy to use. It is admirable, Ubuntu community is very useful for beginners to solve their problems and queries. In this tutorial I choose to Install Ubuntu.
Step 2: Download Ubuntu And Prepare It For Installation
Go to Ubuntu official website and select which version you want to download . Ubuntu latest version is 14.04 LTS (long term support). According to your system choose 32-bit or 64-bit and download, It will download in ISO format. It will take some time depends on your Internet connection after downloading, go to downloaded folder and burn the Image into CD/DVD by using tool or If you want to use USB you need to download "Unetbootin". Remember that backup your data on USB, Unetbootin will remove previously stored data on USB drive and reformat It.

Step 3: Backup Your Windows Installation
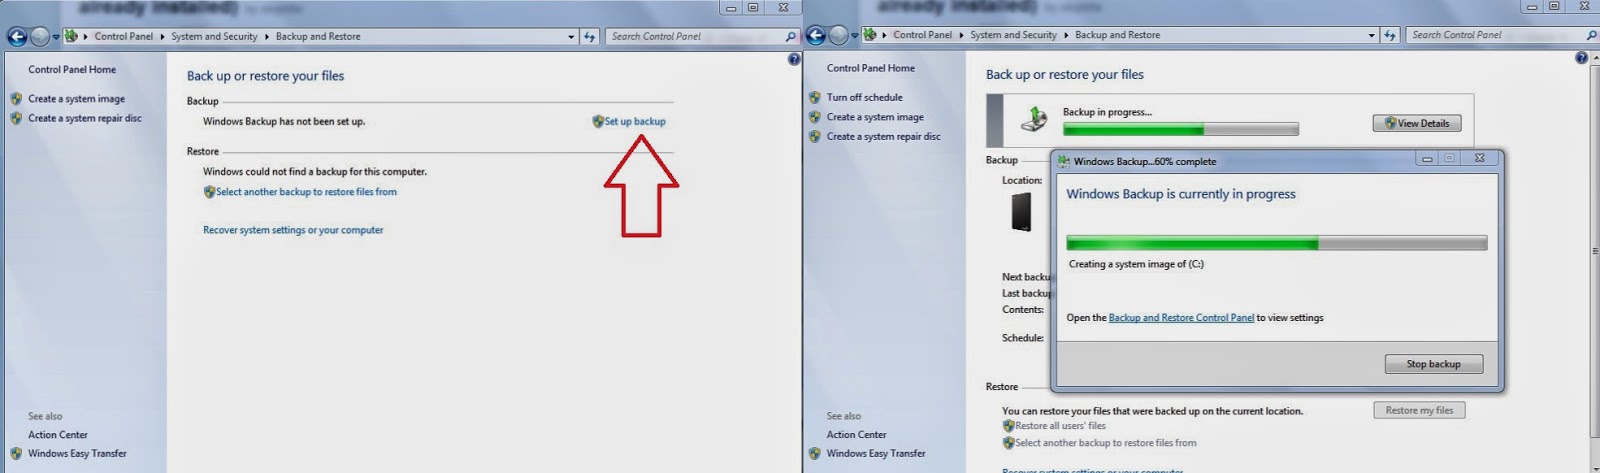
This is most Important step, because any thing went wrong while Installing you can set back your PC with previous windows Installation. To backup your windows you need external hard-disk. Just follow the steps to backup your windows.
- Click on windows >> Open Control Panel >> System & Security .
- In this section select "Back Up and Restore".
- Below you can see the screen shots to get an Idea
Step 4: Disk Management
This is the best way to partition your hard drive. Before I said that you need minimum 30 GB free space is good enough to Install Ubuntu. But If you are planning movies, entertainment application you need to shrink more volume for the Installation. Mostly "C" drive is filled with windows Installation and their applications. So better to select other local drives to shrink volume, which has sufficient free space to Install Ubuntu. I will explain you the best method to partition your hard drive on windows 7, all you need to do is just follow the steps below.

- Click on windows >> In search box type "Disk Management"
- Select "create and format hard disk partitions".
- Now It will display disk management window.
- Select local drive with large amount of free space and right click on It. You can see the option shrink volume click It.
- It will take some time to analyze the memory now It will display shrink window.
- Give minimum 30 GB or more you want. (30 GB = 30000 MB) and click on shrink.
- Now you can see black bar which Indicates "unallocated" memory or drive.
Step 5: Boot Menu
Select USB or CD/DVD to Install Ubuntu/Linux, then reboot your system. It doesn't take you to Installation setup you have to change the first boot priority with USB or CD/DVD in BIOS (basic Input output system). Just follow the below steps to change boot priority.

- Select function key to enter BIOS setup.
- Functional key is not same for all computers. It may vary according to the motherboard brand used for the PC.
- Usually F5, F7, F12 are mostly used functional keys to enter BIOS setup.
- After entering into BIOS click on boot menu change 1st priority with your USB or CD/DVD which you are using to Install Ubuntu/Linux.
- Save your changes and connect your media in to the drive.
- Now reboot It again.
Step 6: Install Ubuntu
It will ask you try Ubuntu without Installing & Install Ubuntu along with other options. If you want demo click on try Ubuntu or you can Install It directly. You can see the below screen shot.

- While Installation process your Internet connection is not working depend on your system please contact official Ubuntu documentation.
- If there is no problem with any network connection, click on Install Ubuntu.
- Select your language and continue.
- Now check the Install third-party software's box. This is necessary for some application or media.
- After that follow the default selections and when ever It will ask you to choose where to Install Ubuntu. It will ask you to Install Ubuntu along with windows 7, Replace windows 7 with Ubuntu.
- Choose Install side by side with existing OS.
- That's It now you can enjoy dual-booting PC with Ubuntu and windows 7.
- When you switch on your PC, It will ask you to choose which operating system you want to start.
Enjoy Regarding to this tutorial do you have any doubts or while Installation process If you face any problems just comment below I will respond to your query within 24 hours.


0 comments:
Post a Comment